Welcome to the future of home networking! With the advent of Wi-Fi 7, also known as 802.11be or Extremely High Throughput (EHT), we’re entering an era of unprecedented wireless speeds, lower latency, and increased network capacity. This revolutionary technology promises to transform how we connect, stream, game, and work from home. However, simply owning a Wi-Fi 7 router isn’t enough; to truly harness its power and ensure optimal performance, strategic setup and ongoing optimization are key. This comprehensive guide will walk you through 7 essential steps to maximize your Wi-Fi 7 router’s capabilities, ensuring you get the most out of your cutting-edge hardware.
Anúncios
Our goal is to help you achieve a seamless, high-speed, and reliable wireless experience throughout your entire home. From initial placement to advanced settings, each step is designed to address common bottlenecks and unlock the full potential of your Wi-Fi 7 Optimization Guide. Let’s dive in and transform your home network!
Understanding Wi-Fi 7: A Quick Overview
Before we delve into optimization, it’s crucial to understand what makes Wi-Fi 7 so powerful. Building upon Wi-Fi 6E, Wi-Fi 7 introduces several groundbreaking technologies:
- 320 MHz Channels: Doubling the channel width of Wi-Fi 6E, Wi-Fi 7 can utilize massive 320 MHz channels (in the 6 GHz band), leading to significantly higher data rates. This is a game-changer for bandwidth-intensive applications.
- 4096-QAM (Quadrature Amplitude Modulation): This advanced modulation scheme allows more data to be packed into each signal, resulting in a 20% increase in peak theoretical speeds compared to Wi-Fi 6E’s 1024-QAM.
- Multi-Link Operation (MLO): Perhaps the most revolutionary feature, MLO allows devices to simultaneously send and receive data across different frequency bands (2.4 GHz, 5 GHz, and 6 GHz). This significantly reduces latency, improves reliability, and aggregates bandwidth for a truly robust connection. Imagine your device using both 5 GHz and 6 GHz at the same time for a single data stream!
- Preamble Puncturing: This feature allows Wi-Fi 7 routers to “puncture” around interfering signals within a wide channel, allowing the rest of the channel to be used efficiently instead of completely abandoning it. This improves spectrum utilization in crowded environments.
These advancements mean Wi-Fi 7 isn’t just about raw speed; it’s about smarter, more efficient, and more reliable wireless communication. Our Wi-Fi 7 Optimization Guide will help you leverage these features effectively.
Step 1: Strategic Router Placement – The Foundation of Optimal Performance
The physical location of your Wi-Fi 7 router is arguably the most critical factor influencing your network’s performance. Even the most advanced router can’t overcome poor placement. Think of your router as the heart of your home network; its position determines how effectively the “blood” (data) flows to all corners of your home.
Central Location is Key
Ideally, your router should be placed in the most central location of your home. This ensures that the Wi-Fi signals radiate outwards equally, providing the most balanced coverage. Avoid placing it in a corner or at one end of the house, as this will result in dead zones and weaker signals in other areas.
Elevate Your Router
Wi-Fi signals tend to travel downwards. Placing your router on a higher shelf, on top of a cabinet, or even mounting it on a wall can significantly improve signal propagation, especially in multi-story homes. Aim for a height that is roughly eye-level or higher.
Avoid Obstructions and Interference
Many common household items can interfere with Wi-Fi signals:
- Physical Obstructions: Walls (especially thick ones like concrete or brick), large metal objects (refrigerators, filing cabinets), and even large furniture can absorb or block Wi-Fi signals. Try to minimize the number of obstacles between your router and your most frequently used devices.
- Electronic Interference: Other electronic devices operating on similar frequencies can cause interference. Keep your router away from microwaves, cordless phones, baby monitors, and even some smart home devices. These can disrupt your Wi-Fi 7 Optimization Guide efforts.
- Water: Large aquariums or even plumbing within walls can significantly dampen Wi-Fi signals.
By carefully considering these factors, you lay a strong foundation for your Wi-Fi 7 Optimization Guide. Remember, a well-placed router is half the battle won when it comes to maximizing performance.
Step 2: Firmware Updates and Router Settings – Keeping Your Router Smart
Just like any other piece of technology, your Wi-Fi 7 router relies on its firmware – the operating system that controls its functions. Keeping this firmware up-to-date is paramount for security, stability, and performance. Manufacturers frequently release updates that fix bugs, improve features, and enhance overall network efficiency.
Regular Firmware Checks
Most modern Wi-Fi 7 routers have an auto-update feature, but it’s always a good idea to manually check for updates occasionally through your router’s web interface or companion app. Newer firmware often includes optimizations specifically for Wi-Fi 7 Optimization Guide features like MLO and 320 MHz channels.
Accessing Your Router’s Web Interface
To access your router’s settings, you’ll typically open a web browser and type in its IP address (e.g., 192.168.1.1 or 192.168.0.1). Consult your router’s manual for the exact address and default login credentials. Change these default credentials immediately for security reasons.
Key Settings to Optimize
- Enable All Bands (2.4 GHz, 5 GHz, 6 GHz): Ensure all available bands are active. Wi-Fi 7 thrives on using the 6 GHz band for its wider channels and less interference.
- Channel Selection: While Wi-Fi 7 is designed to be smarter with channel usage, manual optimization can still help. Use a Wi-Fi analyzer tool (many free apps are available for smartphones and PCs) to identify the least congested channels in your area, especially for the 2.4 GHz and 5 GHz bands. For 6 GHz, interference is less common due to its newer nature, but it’s still good practice to let the router auto-select or choose a high, clear channel.
- Channel Width: For maximum speed, especially on the 6 GHz band, ensure your channel width is set to 160 MHz or 320 MHz if available and supported by your devices. For 5 GHz, 80 MHz or 160 MHz is ideal. For 2.4 GHz, stick to 20 MHz to avoid interference with neighbors.
- QoS (Quality of Service): If your router has QoS settings, configure them to prioritize traffic for critical applications like online gaming, video conferencing, or 4K streaming. This ensures that these activities get the bandwidth they need, even when other devices are active.
- WPA3 Security: Use WPA3 encryption if all your devices support it. It offers enhanced security compared to WPA2.
- Disable Old Protocols: If you don’t have any legacy devices, consider disabling older Wi-Fi protocols (like 802.11a/b/g/n) on your router to improve efficiency, though this is rarely necessary with Wi-Fi 7’s backward compatibility.

Regularly reviewing and updating these settings as part of your Wi-Fi 7 Optimization Guide routine will ensure your router is always performing at its peak.
Step 3: Leverage Multi-Link Operation (MLO) – The Wi-Fi 7 Superpower
Multi-Link Operation (MLO) is one of Wi-Fi 7’s most exciting features, promising unprecedented improvements in latency and reliability. For true Wi-Fi 7 Optimization Guide, understanding and utilizing MLO is crucial.
How MLO Works
Traditionally, a Wi-Fi device connects to a single frequency band at a time (2.4 GHz, 5 GHz, or 6 GHz). MLO breaks this paradigm by allowing devices to simultaneously connect and transmit data across multiple bands. Imagine having two or three separate internet connections for a single device, all working in tandem.
- Aggregated Throughput: By combining bandwidth from different bands, MLO can deliver significantly higher overall speeds. For example, a device might use a 5 GHz link and a 6 GHz link concurrently to achieve a combined, much faster connection.
- Lower Latency: If one band experiences interference or congestion, the data can seamlessly shift or be duplicated across another band, drastically reducing latency and packet loss. This is a game-changer for real-time applications like VR/AR, cloud gaming, and video conferencing.
- Enhanced Reliability: MLO creates a more resilient connection. If one link temporarily drops, the other links can maintain the connection without interruption.
Enabling and Verifying MLO
For MLO to work, both your Wi-Fi 7 router and your client device (smartphone, laptop, smart TV, etc.) must support it. Most Wi-Fi 7 routers will have MLO enabled by default. You can usually verify its status in your router’s advanced wireless settings.
For client devices, ensure their drivers are up-to-date. As Wi-Fi 7 is relatively new, driver updates are crucial for full feature support. Some device manufacturers might have specific settings to enable MLO, though often it’s handled automatically by the operating system and Wi-Fi adapter.
Practical Benefits of MLO
- Gaming: Experience virtually lag-free online gaming with minimal ping spikes.
- VR/AR: Enjoy smoother, more immersive virtual and augmented reality experiences with reduced motion sickness.
- 4K/8K Streaming: Stream ultra-high-definition content without buffering, even with multiple devices streaming simultaneously.
- Large File Transfers: Transfer huge files across your local network at lightning-fast speeds.
By ensuring MLO is active and supported across your network, you’re unlocking a significant portion of what makes Wi-Fi 7 so revolutionary. This is a core component of our Wi-Fi 7 Optimization Guide for superior performance.
Step 4: Optimize Your 6 GHz Band – The Wi-Fi 7 Superhighway
The 6 GHz band is the crown jewel of Wi-Fi 6E and Wi-Fi 7. It offers a vast, uncluttered spectrum with significantly more channels than the 2.4 GHz or 5 GHz bands. For a truly high-performance network, prioritizing and optimizing this band is essential for your Wi-Fi 7 Optimization Guide.
Why 6 GHz is Superior
- Less Interference: Unlike the crowded 2.4 GHz and 5 GHz bands (which are shared with older Wi-Fi devices, microwaves, and other electronics), the 6 GHz band is exclusively for Wi-Fi 6E and Wi-Fi 7 devices. This means minimal interference and cleaner signals.
- Wider Channels: The 6 GHz band supports significantly wider channels, including the massive 320 MHz channels unique to Wi-Fi 7. Wider channels mean more data can be transmitted simultaneously, leading to much higher speeds.
- Higher Capacity: With more available channels and less interference, the 6 GHz band can handle a greater number of devices concurrently without experiencing slowdowns.
Leveraging the 6 GHz Band
To maximize the 6 GHz band, ensure your Wi-Fi 7 router has it enabled. Many routers will broadcast a single SSID (network name) that intelligently steers devices to the best available band. However, if you’re experiencing issues, you might consider creating a separate SSID specifically for the 6 GHz band in your router’s settings. This allows you to manually connect your Wi-Fi 7-compatible devices to this dedicated “superhighway.’
Client Device Compatibility
Remember, only Wi-Fi 6E and Wi-Fi 7 compatible devices can access the 6 GHz band. Check your device specifications to ensure they support this band. If they do, make sure their drivers are updated to fully utilize the 6 GHz capabilities, including 320 MHz channel support and MLO.
Considerations for 6 GHz
While powerful, the 6 GHz band has a slightly shorter range and is more susceptible to physical obstructions (walls, furniture) compared to the 2.4 GHz band. This is why strategic router placement (Step 1) is even more critical when aiming to maximize 6 GHz coverage. For devices further away or behind multiple walls, the 5 GHz or even 2.4 GHz band might provide a more stable, albeit slower, connection. MLO helps bridge this gap by allowing devices to intelligently switch or combine bands.
By consciously directing your Wi-Fi 7-compatible devices to the 6 GHz band whenever possible, you’ll experience the full speed and low-latency benefits that Wi-Fi 7 promises, making it a cornerstone of your Wi-Fi 7 Optimization Guide.
Step 5: Wi-Fi Mesh Systems and Extenders – Expanding Your Network Reach
Even with optimal router placement and settings, large homes, multi-story houses, or homes with unusual layouts can still suffer from dead zones or weak signal areas. This is where Wi-Fi mesh systems or range extenders come into play. For a comprehensive Wi-Fi 7 Optimization Guide, ensuring wall-to-wall coverage is essential.
Wi-Fi Mesh Systems
A Wi-Fi mesh system consists of multiple Wi-Fi access points (nodes) that work together to create a single, seamless network throughout your home. Unlike traditional extenders, mesh nodes communicate with each other to form a cohesive network, intelligently routing traffic and providing consistent speeds as you move from room to room. Many Wi-Fi 7 routers are designed to be part of a mesh system, or you can purchase dedicated Wi-Fi 7 mesh kits.
Benefits of Mesh Systems:
- Seamless Roaming: Your devices automatically connect to the strongest mesh node without dropping the connection.
- Whole-Home Coverage: Eliminates dead zones and provides strong, consistent Wi-Fi everywhere.
- Scalability: Easily add more nodes to expand coverage as needed.
- Centralized Management: Manage your entire mesh network from a single app or web interface.
Range Extenders
Traditional range extenders (also known as Wi-Fi boosters or repeaters) capture your existing Wi-Fi signal and re-broadcast it. While they can extend coverage, they often come with a trade-off: reduced bandwidth and potential latency issues, as they have to receive and then re-transmit the signal on the same channel. However, a Wi-Fi 7 compatible extender might offer better performance than older models, especially if it utilizes the 6 GHz band or MLO for its backhaul connection.
Choosing Between Mesh and Extenders
- For large homes or complex layouts: A Wi-Fi 7 mesh system is almost always the superior choice for consistent performance and seamless roaming.
- For small areas or specific dead spots: A Wi-Fi 7 range extender might be a cost-effective solution, but be mindful of potential speed reductions.
When implementing a mesh system, ensure your primary router and satellite nodes are all Wi-Fi 7 compatible to fully leverage features like MLO and 320 MHz channels across your entire network. This ensures your Wi-Fi 7 Optimization Guide extends to every corner of your property.
Step 6: Wired Connections and Ethernet Backhaul – The Unbreakable Link
While Wi-Fi 7 offers incredible wireless speeds, a wired Ethernet connection will always provide the fastest, most reliable, and lowest-latency connection. For devices that demand maximum performance and stability – like desktop PCs, gaming consoles, smart TVs, and network-attached storage (NAS) devices – a wired connection is still king.
The Power of Ethernet
- Maximum Speed: Ethernet cables (Cat5e, Cat6, Cat6a, or Cat7) can support speeds of 1 Gigabit per second (Gbps), 2.5 Gbps, 5 Gbps, or even 10 Gbps, depending on the cable and your router’s Ethernet ports. Many Wi-Fi 7 routers come with multi-gigabit Ethernet ports (2.5 Gbps or 10 Gbps) to match their wireless capabilities.
- Zero Latency: Wired connections eliminate wireless interference and signal degradation, resulting in virtually zero latency and packet loss. This is crucial for competitive online gaming and sensitive applications.
- Reliability: A wired connection is immune to wireless interference, ensuring a stable and consistent link.
Ethernet Backhaul for Mesh Systems
If you’re using a Wi-Fi mesh system (as discussed in Step 5), utilizing an Ethernet backhaul for your mesh nodes can dramatically improve overall network performance. An Ethernet backhaul means connecting your mesh nodes to each other (or to the main router) using Ethernet cables rather than relying solely on wireless communication between them. This frees up wireless bandwidth for your devices and ensures the fastest possible connection between nodes.
Benefits of Ethernet Backhaul:
- Dedicated Bandwidth: The wired connection provides a dedicated, high-speed link for mesh nodes to communicate, preventing wireless congestion.
- Improved Wireless Performance: With the backhaul handled by Ethernet, the wireless bands on your mesh nodes are fully available for client devices, leading to faster speeds and lower latency for everyone.
- Optimal Placement Flexibility: You can place mesh nodes further apart without worrying as much about wireless signal strength between them.
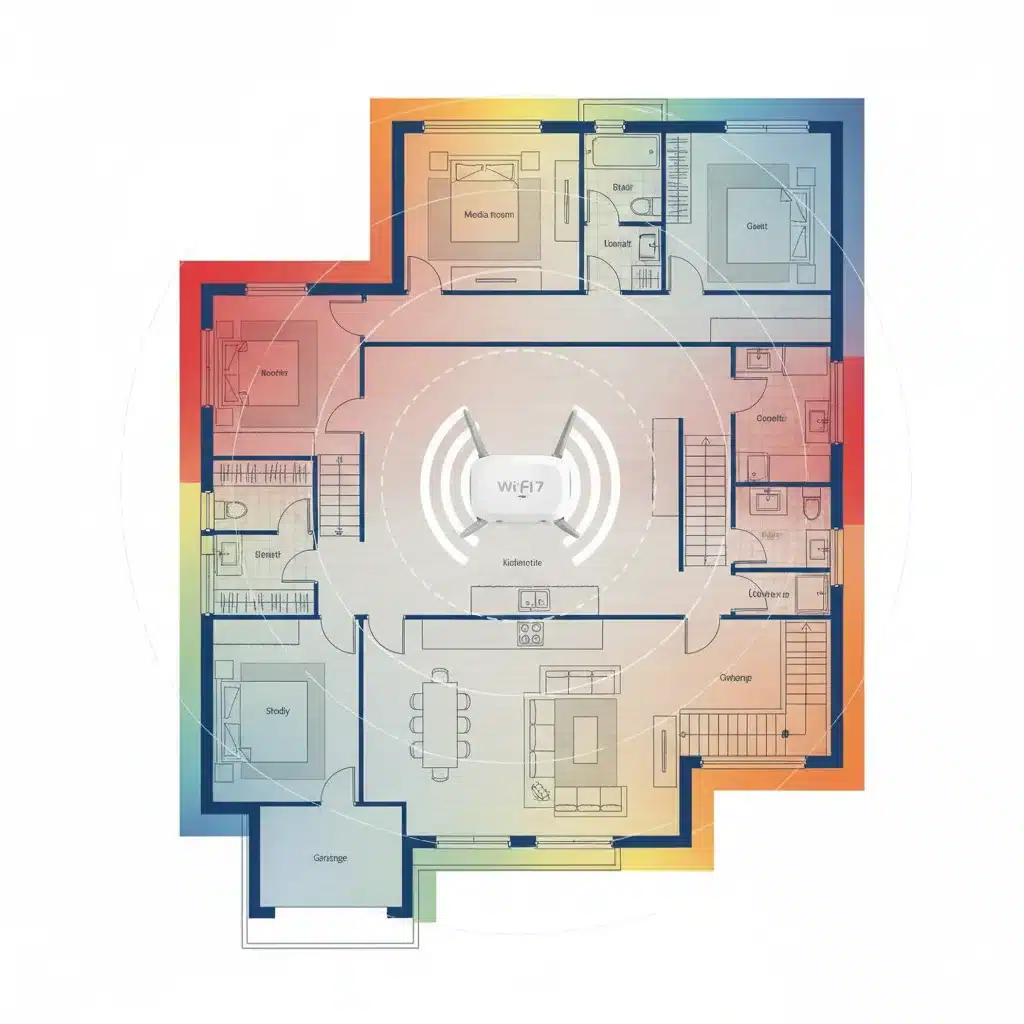
For any device that doesn’t move frequently and requires top-tier performance, connect it directly to your Wi-Fi 7 router or a mesh node via an Ethernet cable. If you’re setting up a mesh system, seriously consider running Ethernet cables for backhaul connections. This strategic use of wired connections is a vital part of your Wi-Fi 7 Optimization Guide.
Step 7: Monitor and Troubleshoot – Maintaining Peak Performance
Optimizing your Wi-Fi 7 network isn’t a one-time task; it’s an ongoing process. Regular monitoring and proactive troubleshooting are essential to maintain peak performance and address any issues that may arise. This final step in our Wi-Fi 7 Optimization Guide ensures your network remains robust and responsive.
Utilize Router Monitoring Tools
Most Wi-Fi 7 routers come with built-in monitoring tools accessible through their web interface or companion app. These tools can provide valuable insights into your network’s health:
- Connected Devices: See which devices are connected, to which band, and their current data usage.
- Traffic Monitor: Identify bandwidth-hungry applications or devices that might be monopolizing your network.
- Signal Strength: Some routers can show the signal strength of connected devices, helping you identify areas with weak coverage.
- CPU/Memory Usage: Monitor your router’s internal resources to ensure it’s not overloaded.
Wi-Fi Analyzer Apps
Third-party Wi-Fi analyzer apps (available for smartphones and computers) are invaluable for diagnosing wireless issues. They can:
- Identify Channel Congestion: Show you which Wi-Fi channels are most crowded in your area, helping you make informed decisions about channel selection (Step 2).
- Measure Signal Strength: Walk around your home to map out signal strength and identify dead zones.
- Detect Interference: Pinpoint sources of interference from other networks or electronic devices.
Regular Speed Tests
Periodically run speed tests (e.g., Speedtest.net) from various locations in your home and on different devices. Compare these results to your internet service provider’s advertised speeds and to previous tests. Significant drops in speed can indicate a problem that needs investigation.
Troubleshooting Common Issues
- Slow Speeds: Check for channel congestion, move closer to the router, ensure MLO is active, and verify no devices are hogging bandwidth.
- Dropped Connections: Update device drivers, check for firmware updates on your router, ensure proper placement, and look for sources of interference.
- Dead Zones: Consider a mesh system (Step 5), adjust router placement, or use a Wi-Fi 7 compatible extender.
- Router Reboot: Sometimes, a simple reboot of your router can resolve many temporary performance issues. It clears the router’s memory and restarts all network services.
By actively monitoring your network and being prepared to troubleshoot, you can quickly address any performance dips and ensure your Wi-Fi 7 Optimization Guide continues to deliver a top-tier wireless experience.
The Future is Fast: Embracing Your Wi-Fi 7 Network
Wi-Fi 7 represents a monumental leap forward in wireless technology, offering speeds and efficiencies that were once unimaginable. By following this 7-step Wi-Fi 7 Optimization Guide, you’re not just setting up a router; you’re building a future-proof smart home network that can handle the demands of tomorrow’s connected world.
From ensuring optimal physical placement and keeping your firmware updated, to leveraging the groundbreaking features of MLO and the expansive 6 GHz band, each step plays a crucial role in unlocking your router’s full potential. Don’t forget the power of wired connections for critical devices and the benefits of a mesh system for whole-home coverage. Finally, continuous monitoring and troubleshooting will keep your network running smoothly for years to come.
Embrace the speed, reliability, and low latency that Wi-Fi 7 offers. With these practical solutions, your home network will be a seamless, high-performance hub for all your digital needs. Enjoy the unparalleled experience of a truly optimized Wi-Fi 7 network!